Development with LocalWP
LocalWP is a development stack aimed for WordPress Developement (but also works with Laravel and other PHP Applications) available on macOS, Windows, and Linux.
While LocalWP was originally designed to work with Flywheel Hosting and WPEngine, You can use itto develop WordPress and PHP Application for any hosting provider including Cloudways.
Features
LocalWP was designed to give you the environment as close as the real web server as possible while keep everything simple.
- Support PHP from 7.4 to 8.4. User can freely choose which version to run per project.
- Support both Nginx and Spache.
- Support local domain with self-signed SSL, enabel developer to develop feature which require HTTPS (such as Geolocation API) locally.
- Ship with Mailpit to cache email sent out locally without the need of setting up SMTP Server.
- Integrated with LiveLink, let developer send out preview link for their local website.
Create new project
Follow these steps to create a new local WordPress project using LocalWP:
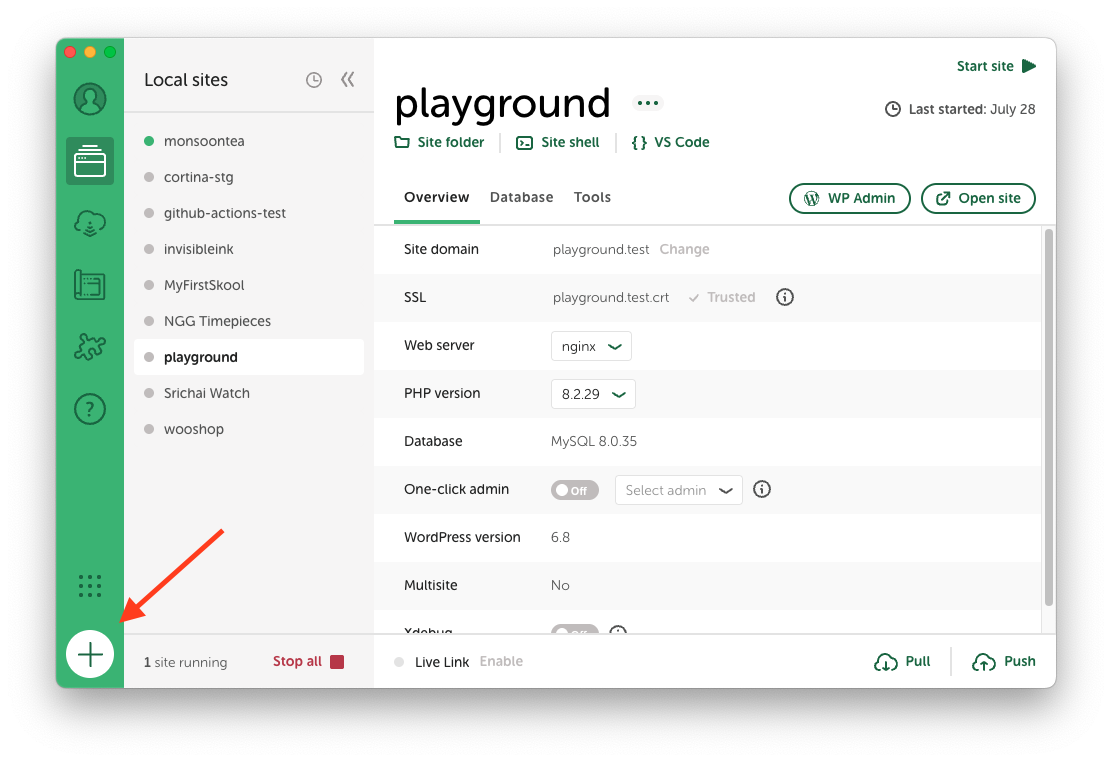
- Launch LocalWP and Click the ➕ (plus) icon located at the bottom-left corner of the LocalWP window.
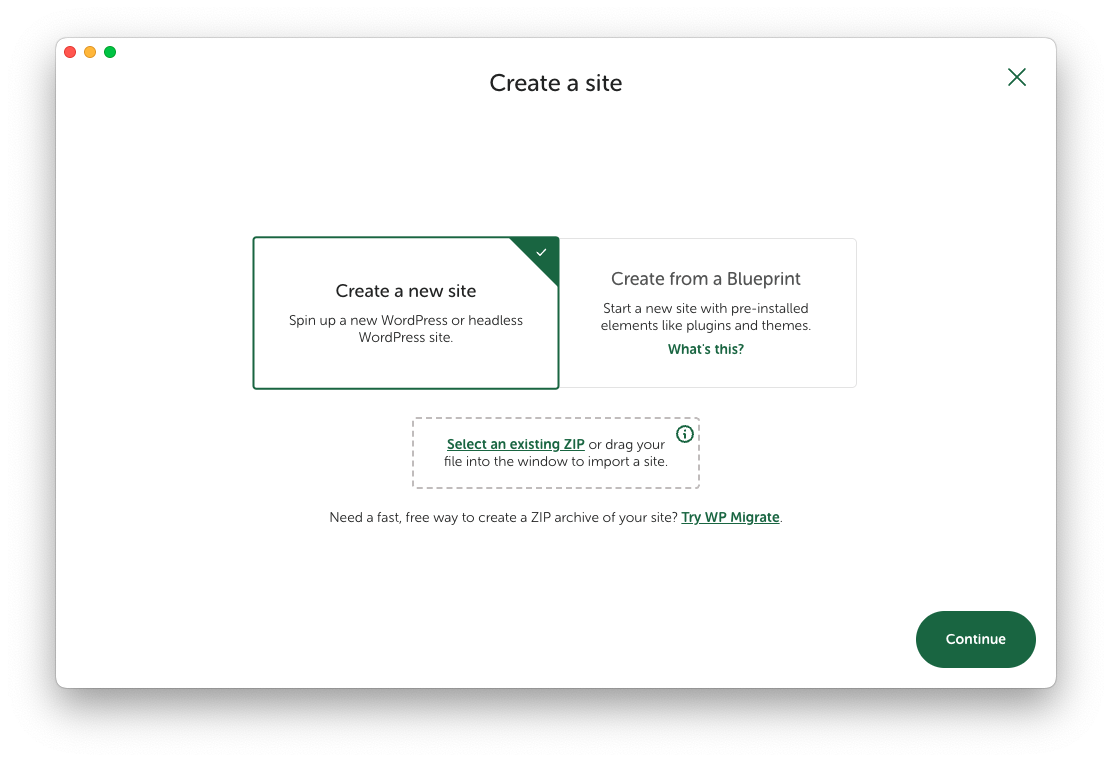
- Select Create a new site and click Continue
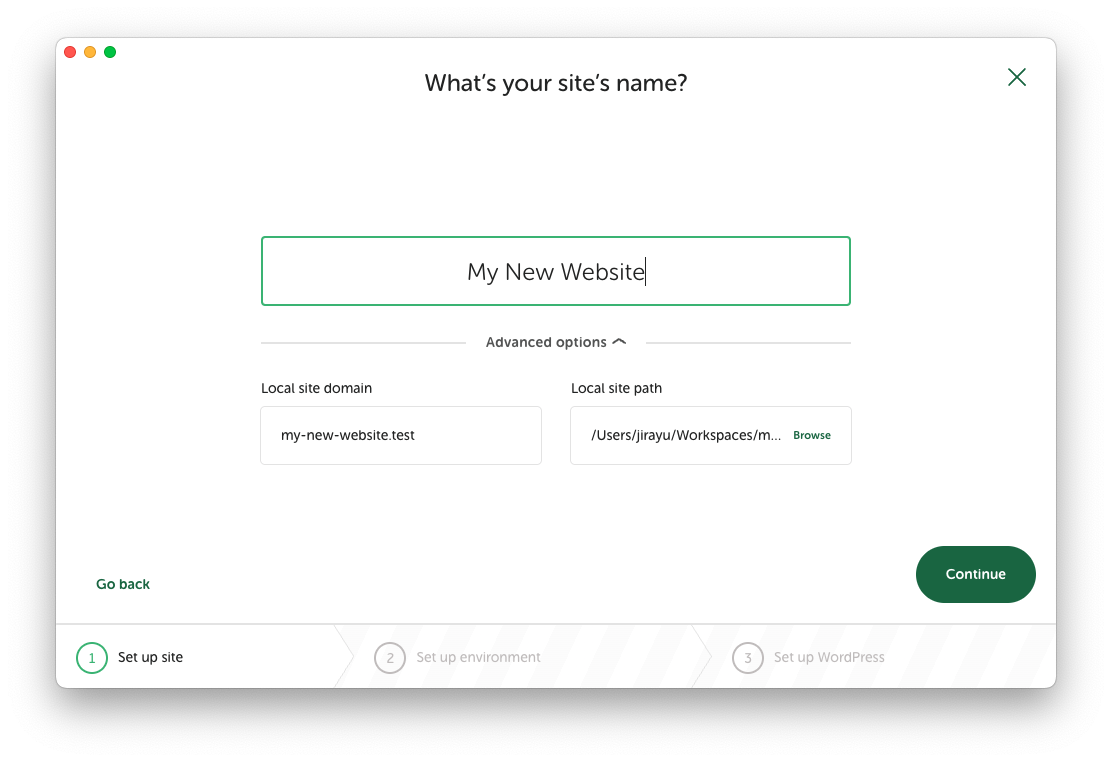
- Enter website name. You can customize local domain or change project directory by clicking on Advanced options. Click Continue when done.
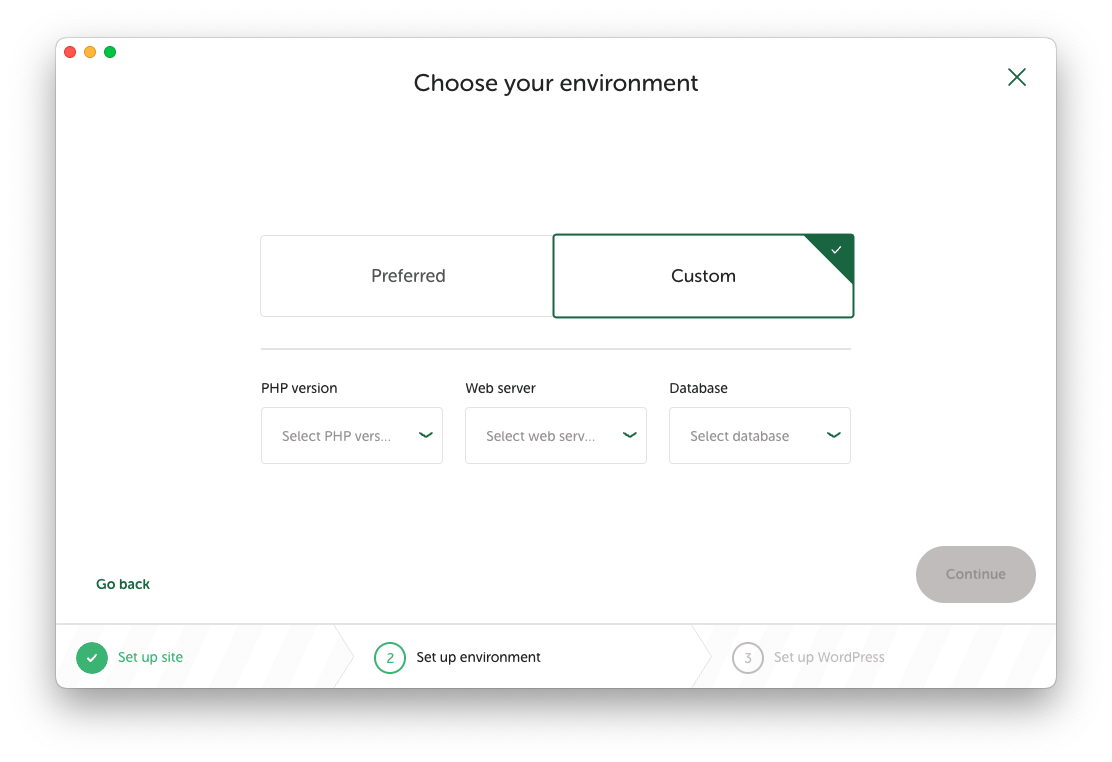
- You may choose a Preferred or Custom environment. It’s recommended to match your production environment as closely as possible.
- Select the PHP version, web server (Apache or Nginx) that matches your production setup.
- If unsure, check your production server details or ask your developer.
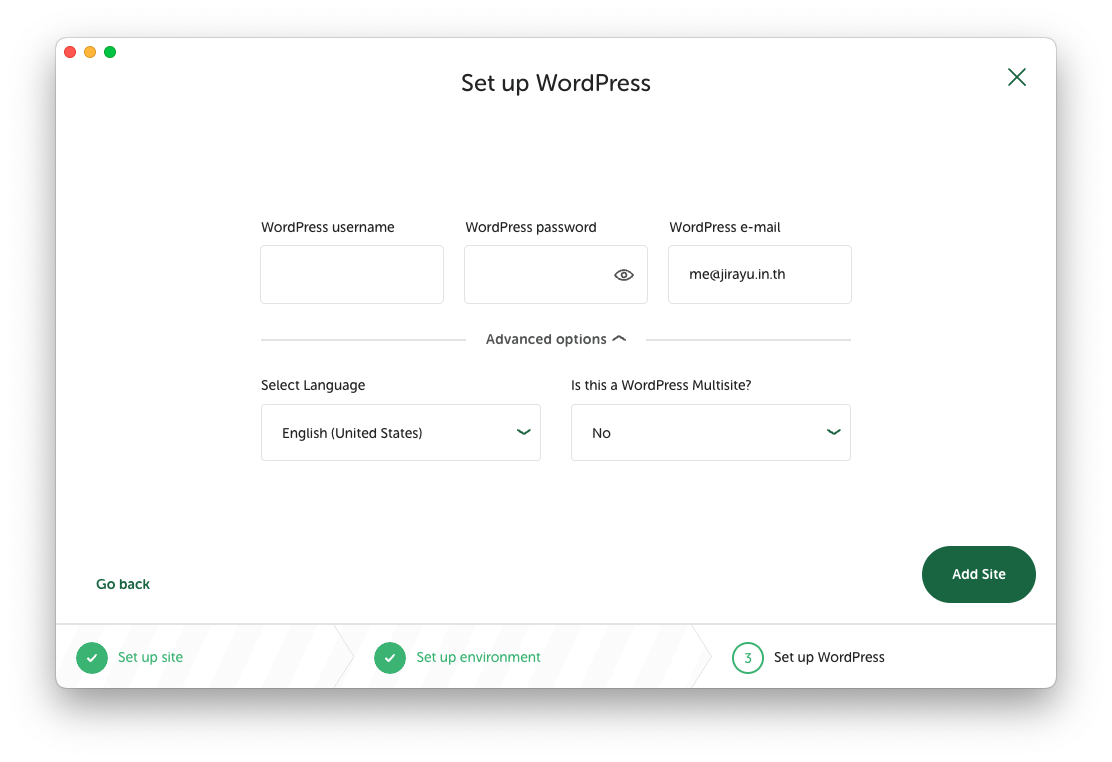
- Enter username and password for Admin account. You can also change site language and enable multisite capability in Advanced options. Then click Add Site
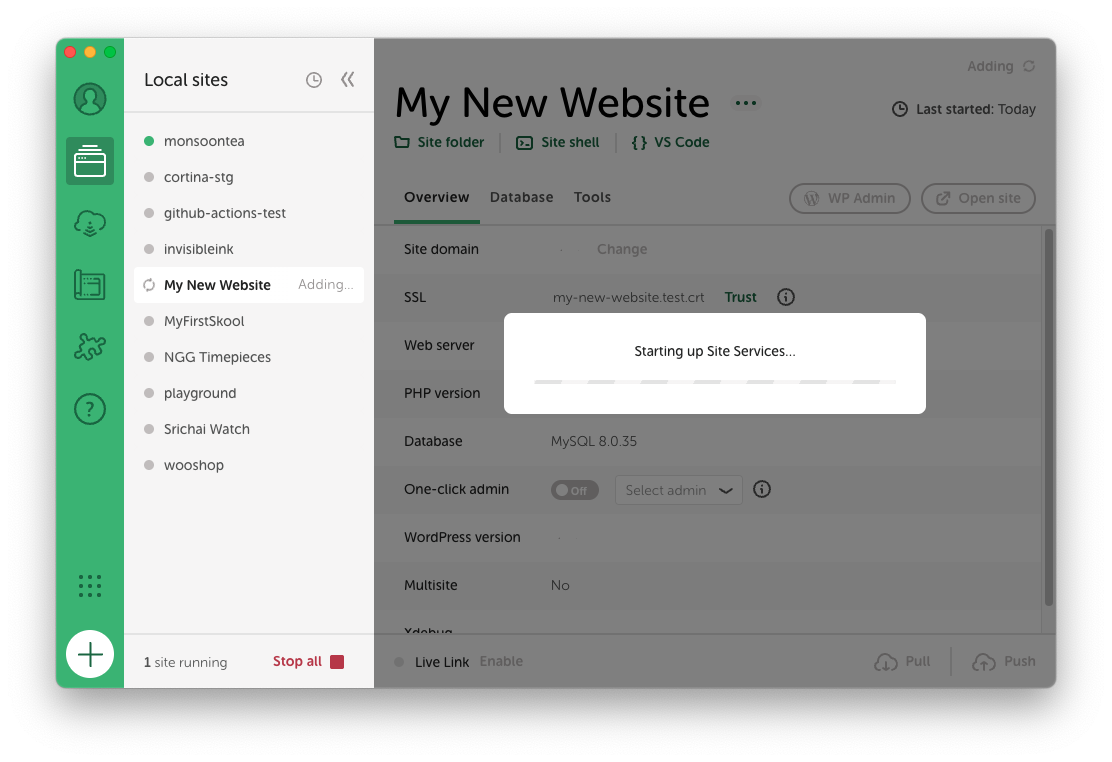
- LocalWP will start provisioning your website. It may ask for your computer password. Once provisioning is finished, you can now access your website.
Import project from staging/production
Setup local HTTPS
Some feature (such as JavaScript Geolocation API or Service Workers) required HTTPS to work with. To enable HTTPS in LocalWP site, please follow these steps
Go to
WP-Admin > Settings > Gerneral, then update bothWordPress Address (URL)andSite Address (URL)to be HTTPS.Go to LocalWP dashboard. Select
Overview, under SSL section, click onTrustedIn recent version of macOS, Applications can no longer automatically trust self-signed certificate. User need to trust the certificate manually.
Open
Keychain Accessapp. Go toSystem > Certificates, you will find a certificate with the same name of the project with redxicon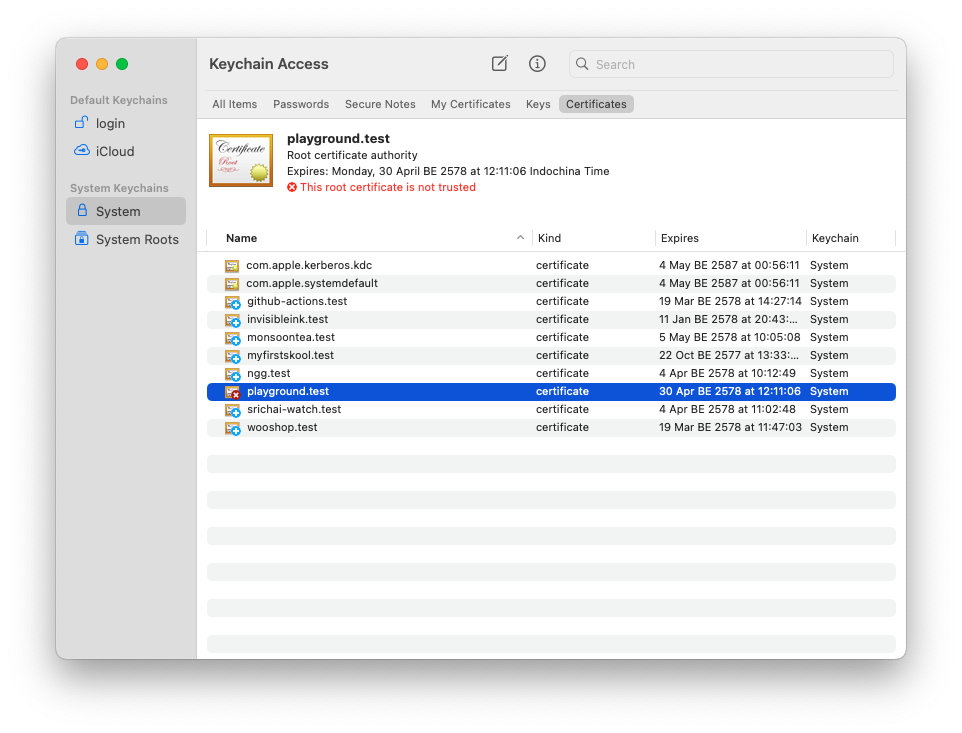
Double click that certificate, expand the
Trustsection, then change value ofWhen using this certificatetoAlways Trust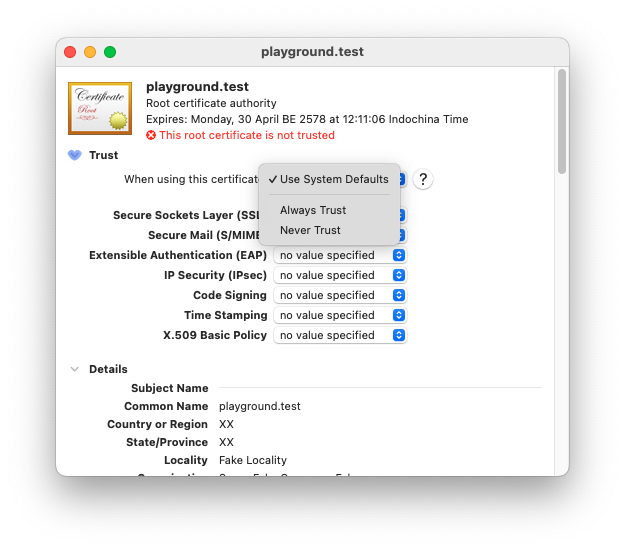
Keychain will ask you to enter password to confirm. Once done, you should be able to access the local website via HTTPS.
Update configuration for WP-CLI
macOS run most apps inside sandbox, including LocalWP, for security reason. Though this approach make it impossible for PHP that installed outside the sandboxed enviroment to directly connect to service running inside sandbox.
In short, wp-cli installed locally won't work with LocalWP.
To mitigate the issue, we have to tell WordPress to connect to database via sock.
Go to the project inside LocalWP then navigate to Database tab of said project. Copy the value in Socket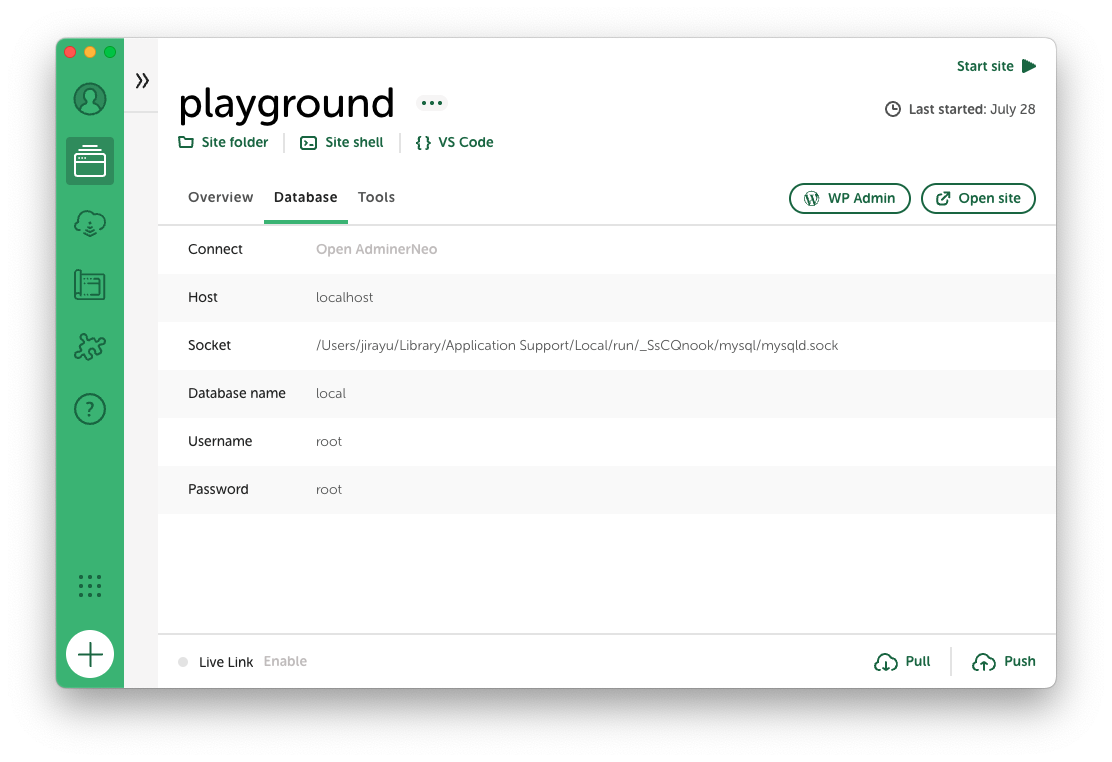
from the image above, the Socket would be:
/Users/jirayu/Library/Application Support/Local/run/_SsCQnook/mysql/mysqld.sockOpen wp-"config.php of the project. then update the key DB_HOST with socket path. Also add localhost: at the front. For example:
define( 'DB_HOST', 'localhost:/Users/jirayu/Library/Application Support/Local/run/_SsCQnook/mysql/mysqld.sock');Work with Git
There are two scenarios here
- Newly created project. Never added to git repository before.
- Existing project. Continue working on a project that already in git.
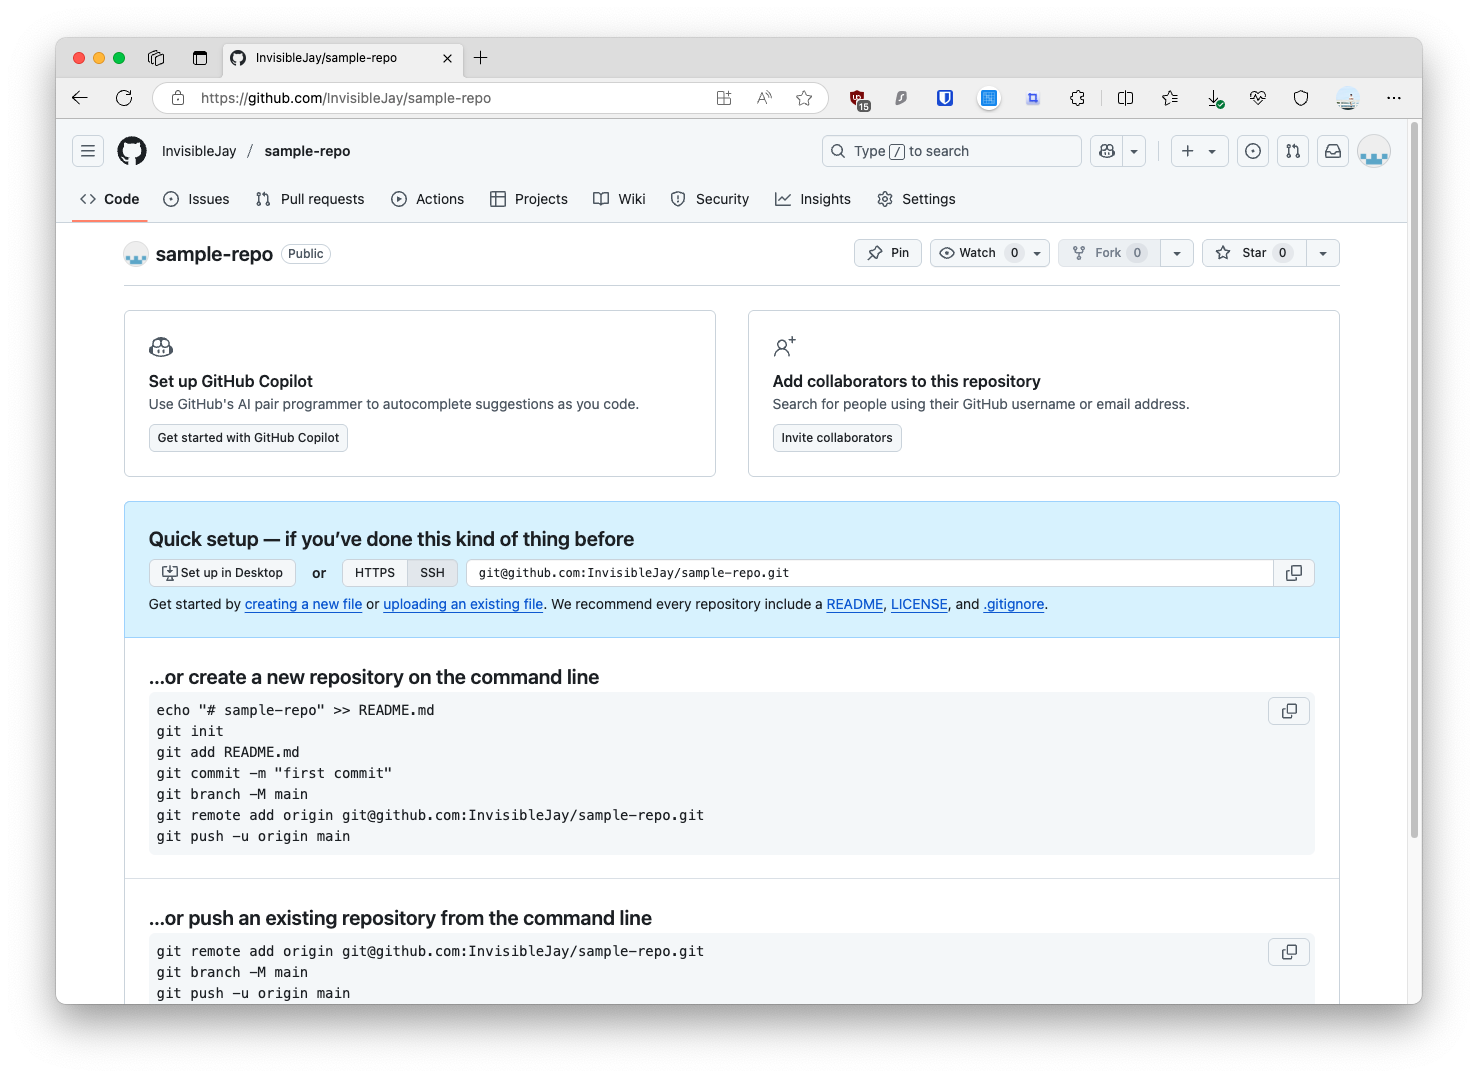
Newly created project
Let's say we are starting a new project. We have created a git repository on GitHub and ready to push the initial commit.